Spring Boot 실행하기
Spring boot 실행
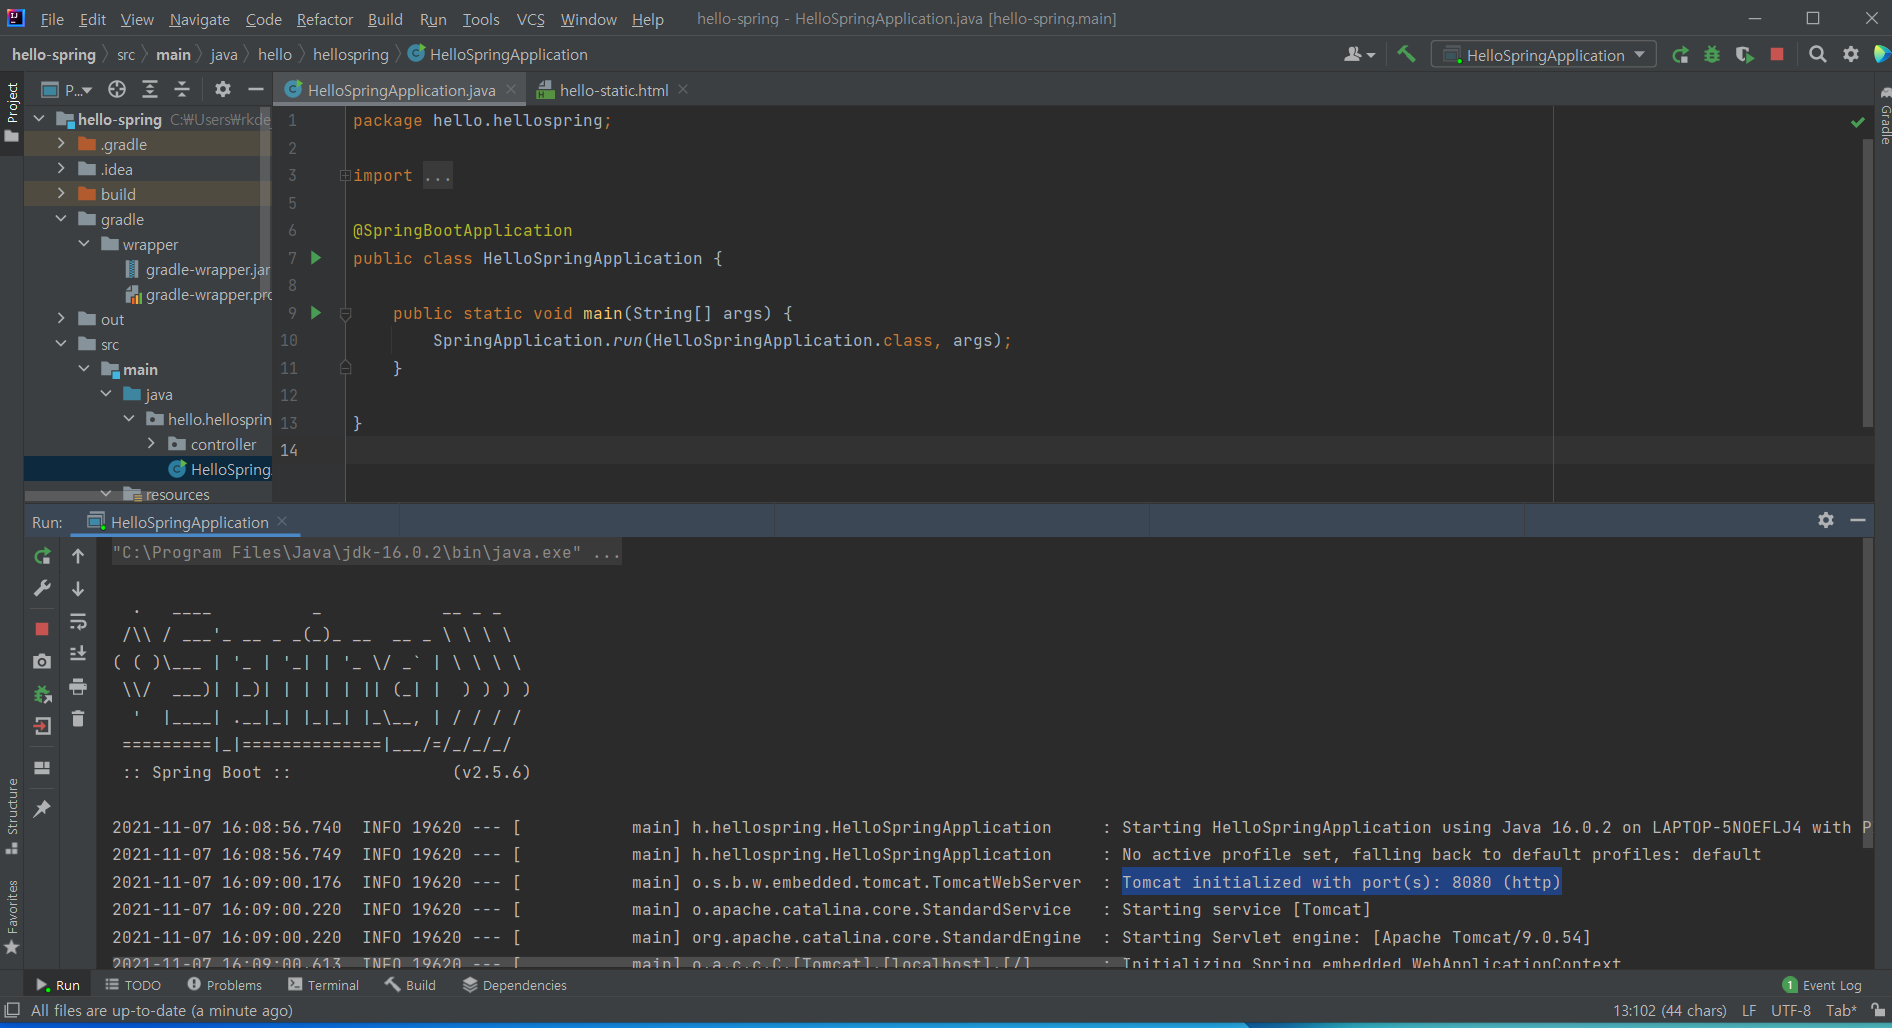
파일을 열었다면 src/main/java 밑에 HelloSpringApplication 파일을 열어보자 파일명은 다를수있다.
package hello.hellospring;

import org.springframework.boot.SpringApplication;
    import org.springframework.boot.autoconfigure.SpringBootApplication;

@SpringBootApplication
public class HelloSpringApplication {

	public static void main(String[] args) {
		SpringApplication.run(HelloSpringApplication.class, args);
	}
}
main 메소드 안에서 프로세스가 실행되므로 run해본다.
결과

Spring Boot와 여러 Log 메세지들을 확인할 수 있는데 그중 Tomcat initialized with port(s): 8080 (http)를 보면 8080포트를 사용했다는 표시가 나온다.
웹브라우저에서 localhost:8080을 입력해보자. 에러 메세지가 잔뜩 나오는게 정상이다.
Welcome Page 작성
Spring Boot는 기본적으로 resource/static/index.html을 첫화면으로 띄우게 되어있다.
그러므로 resource/static 밑에 index.html 파일을 생성하자.
<!DOCTYPE HTML>
<html>
<head>
    <title>Hello</title>
    <meta http-equiv="Content-Type" content="text/html; charset=UTF-8" />
</head>
<body>
Hello
<a href="/hello">hello</a>
</body>
</html>
이클립스에서 실행을 중지하고 다시 실행시켜 localhost:8080에 접속하면 html이 출력되는걸 볼 수있다.
